First Person Animations for UE4
in Game Design on Ue4, Maya
Animation is a powerful medium that can bring our fantasies to life. Animation in video games especially can be used to strengthen storylines or give necessary visual feedback to the player. Spending just a bit of time on custom animation can be that extra factor that gives your game added personality and uniqueness.
In this tutorial, I will be showing you how to create 1st person animations for your Unreal games. Although techniques I bring up can apply to any game engine, we will be using tools that target the Unreal Engine.
Getting Ready
Before getting started, let’s make our life easier and download some plugins that will speed up our workflow. Unreal supplies us with the Animation and Rigging toolkit (ART) – which as the name implies, is great for rigging and animating our characters – for free, but it’s a bit tricky to set up. After downloading the plugin (via the Unreal marketplace), you have the option to install it to an engine (doesn’t matter which, but note the version). Navigate to the file: userSetup.py (In my case, it is under: D:\Programs\EpicGames\Engine\UE_4.15\Engine\Plugins\Marketplace\ARTv1\MayaTools). We need to point Maya to this plugin and we do this by copying this file and pasting it into the Maya plugins folder (Documents\Maya\Plugins).
Upon opening Maya, it will ask you to locate the original userSetup.py file. Do that and the ART plugin will now appear on the menu bar. Click the “Add a Character for Animation” option under the ART tool dropdown, and select mannequin. Import it to your scene and the standard Unreal character model should now be loaded in. The rig itself is quite complex, it’s really worth it to take a look at the model’s control system before continuing.
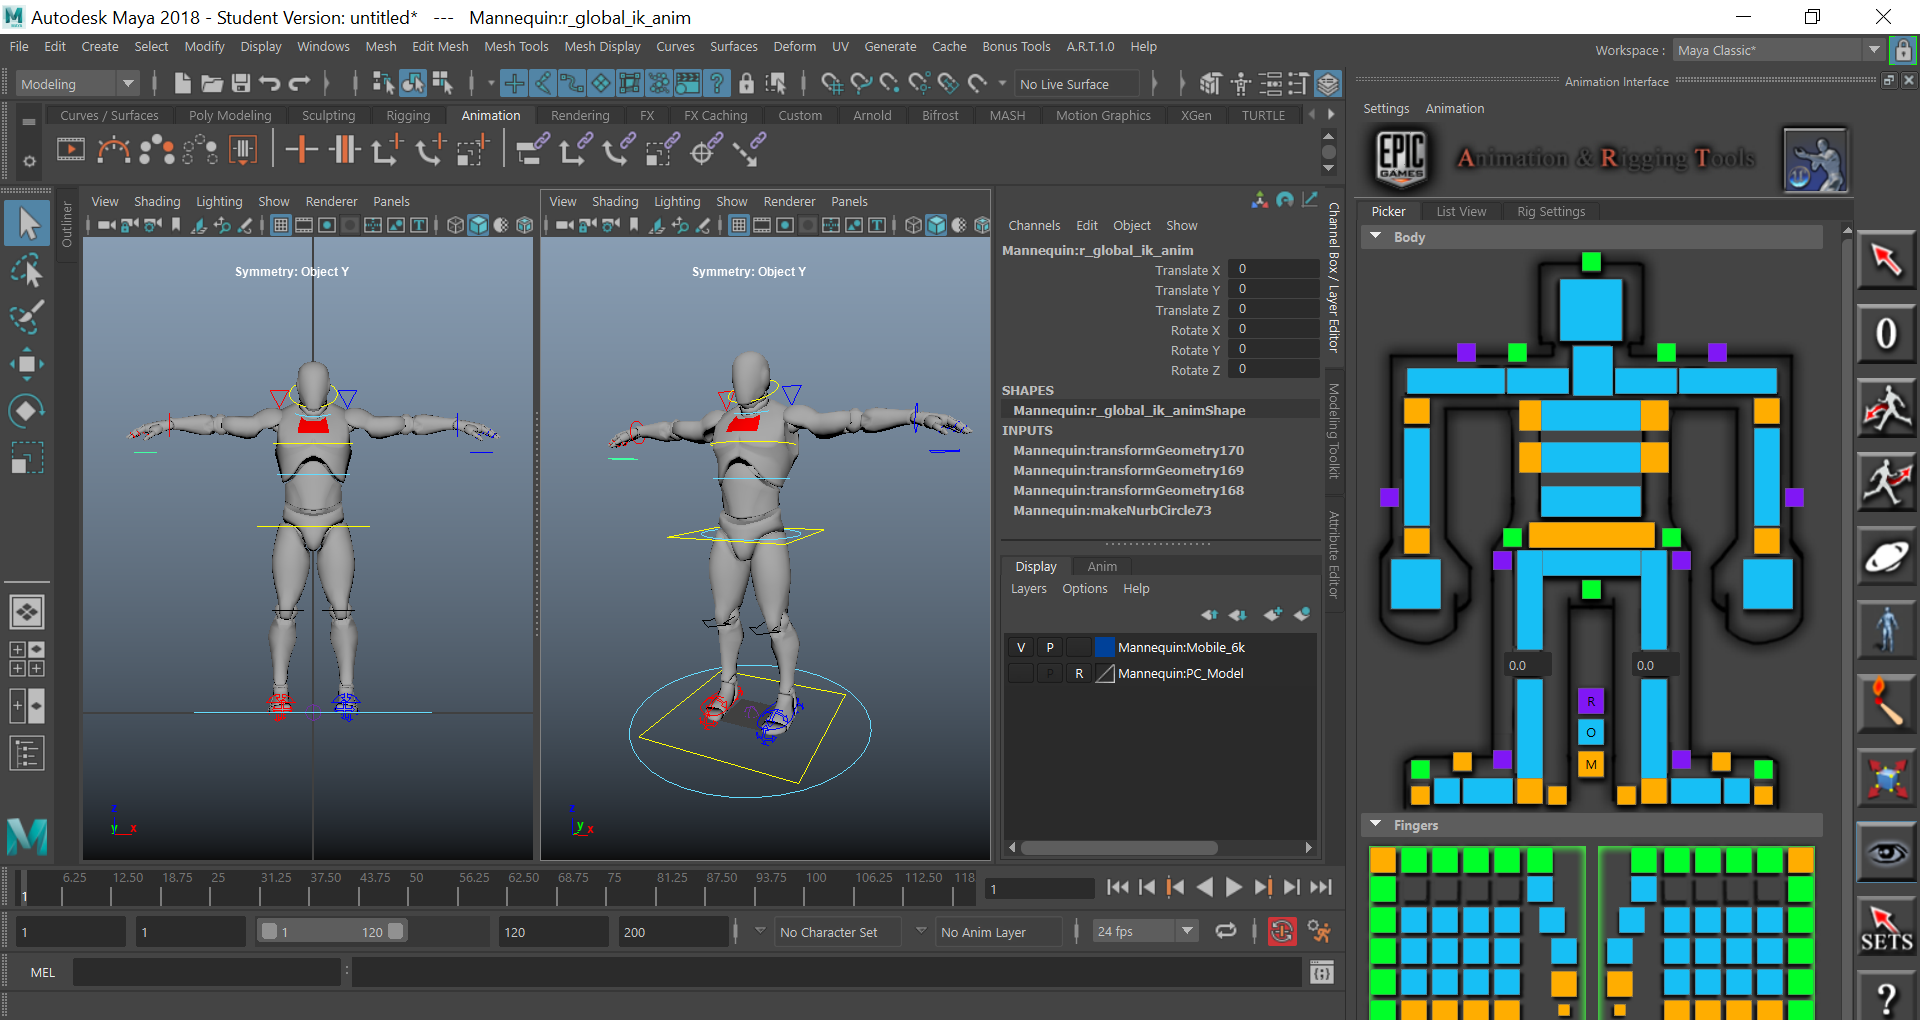
Setting Up Our Rig
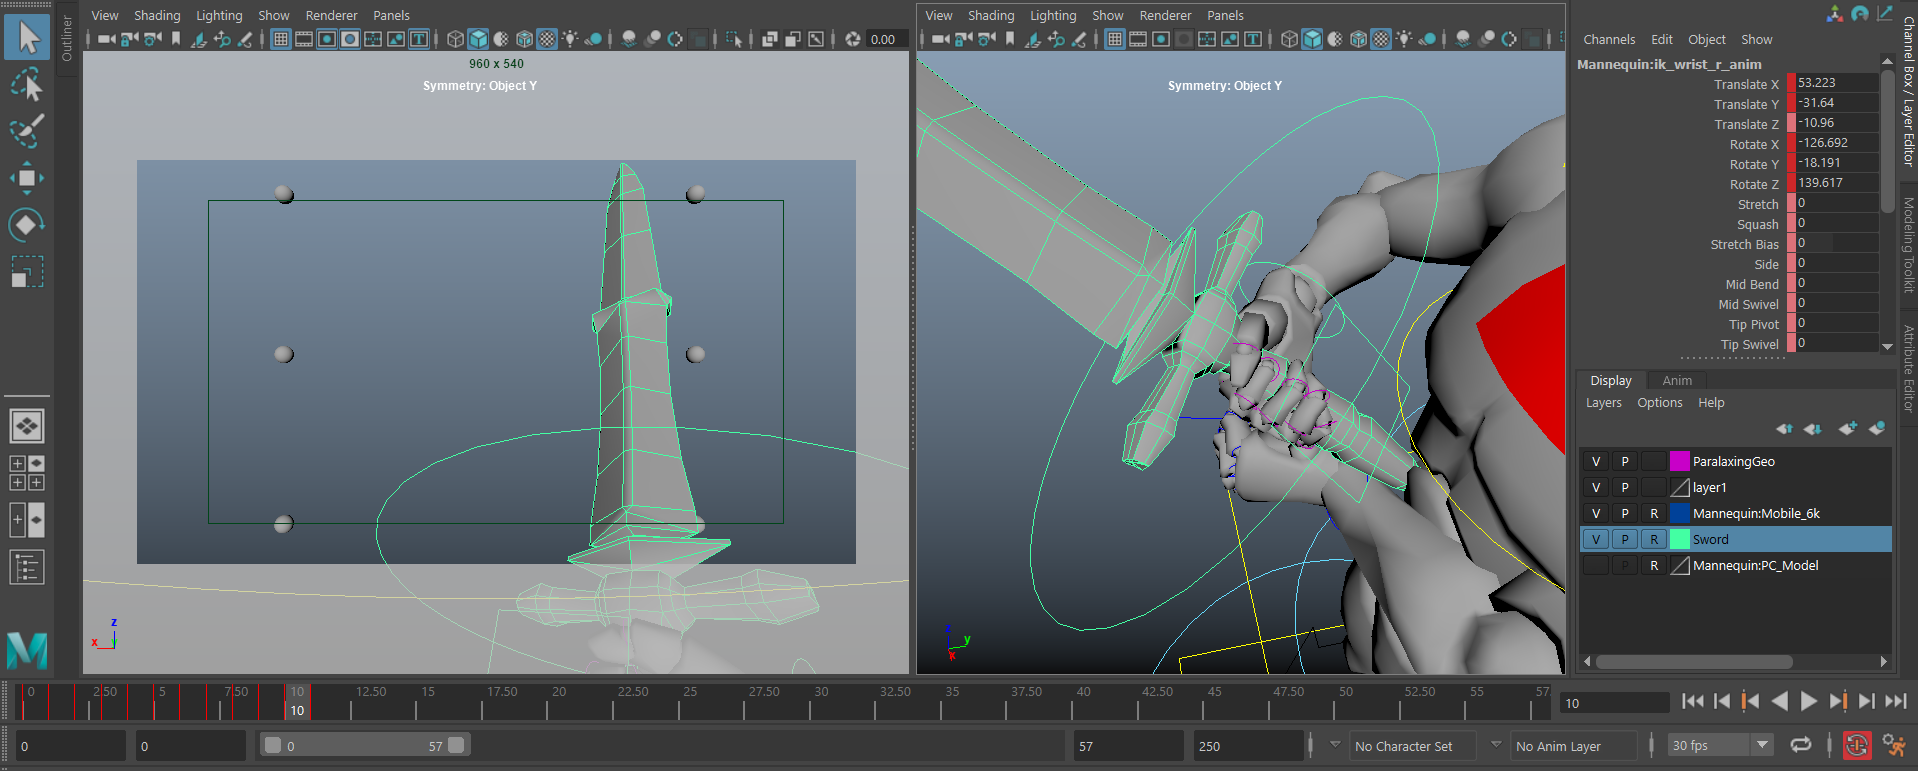
Let’s get our model ready for animation! If you noticed, there was no option to import a first person Unreal model, so we have to make some modifications. Create a camera and resize it to your liking. In the end, we want to replace the head with our camera. Select the head and hide it by hitting Ctrl-H. Next, we need to parent the camera to the head joint. Joints are hidden on our mesh by default, so navigate to the outliner and select the head joint & go to Display->Show->Show Selected.
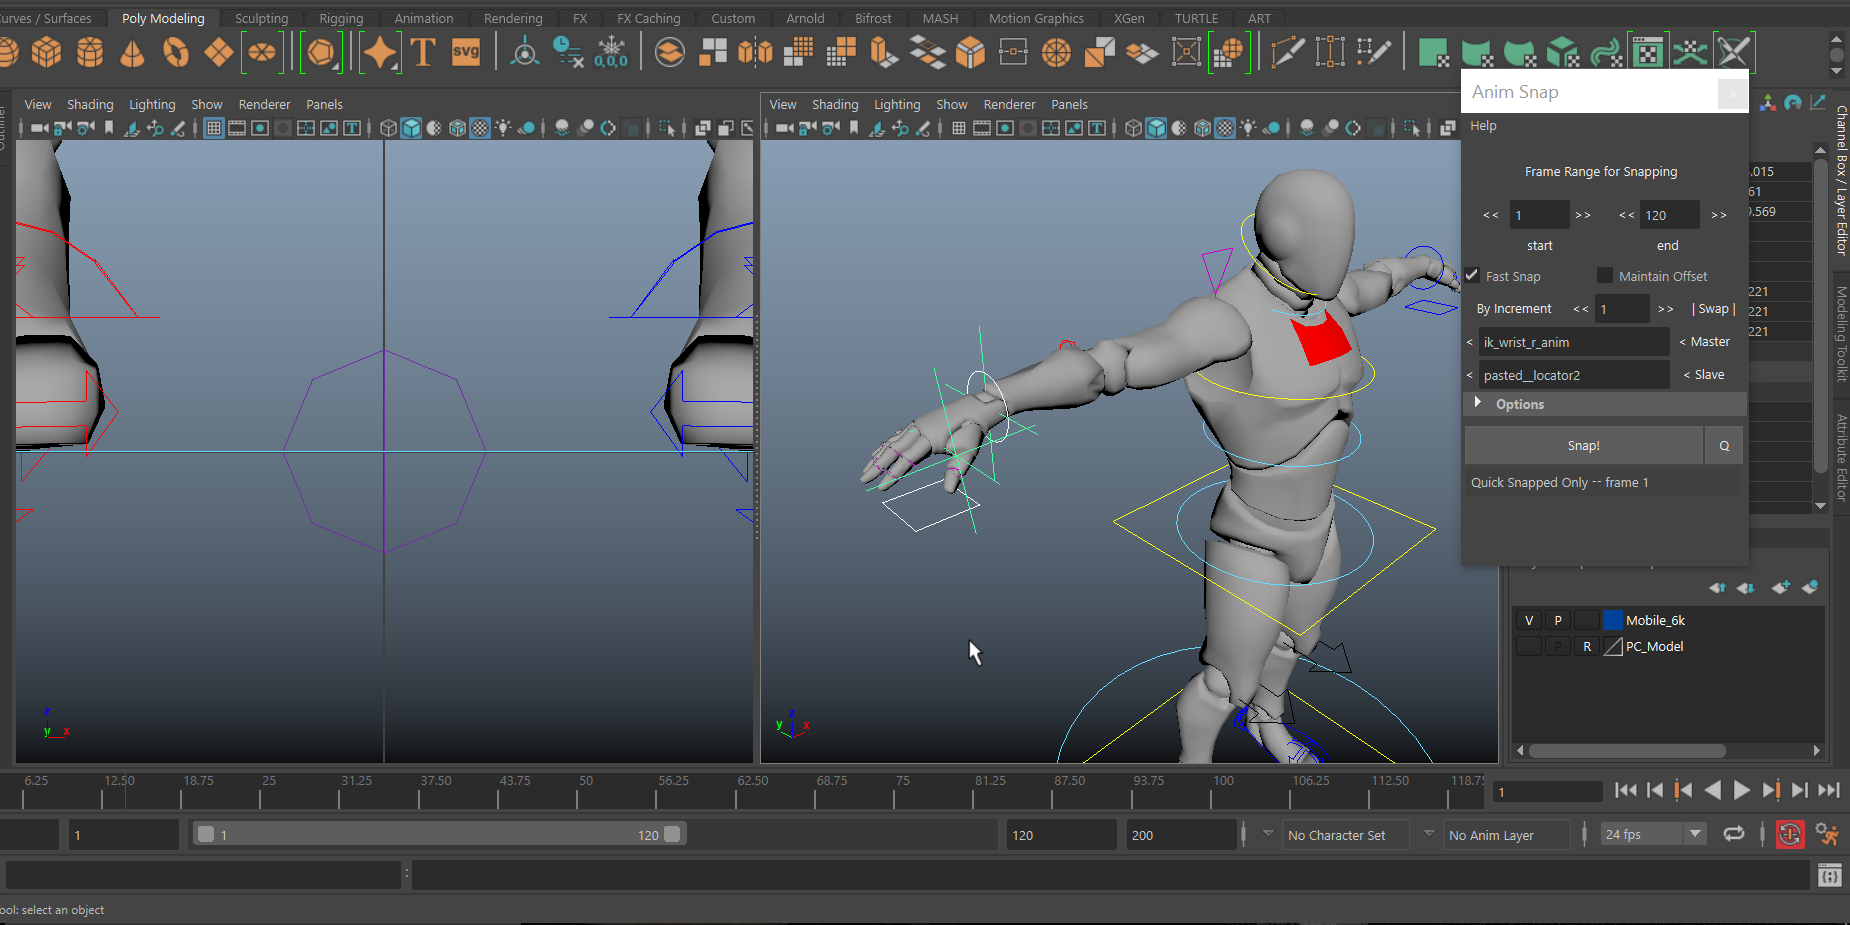
We have several options for snapping objects together, but I really recommend downloading the animSnap plugin. It’s a great animation tool for constraining objects together. After installing the plugin, type animSnap on the command line to bring it up.
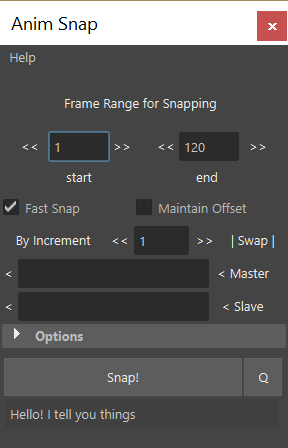
From the tool, assign the head joint to the master and the camera to the slave. Click on the magnifier icon next to the snap button to snap the objects together (You may need to rotate the camera after to correct the setup). To finish this part up, parent the camera to the joint using the P shortcut.
Maya’s default camera does no match with Unreal’s camera system automatically, so go into the cameras attributes and change its focal length to 21.5. Finally, open up the camera in a new viewport and turn on its film gate. We are now ready to animate!
Animation
Keep in mind that there are many approaches to animation. I’m going to explain my (still developing) style and some tips I picked up along the way, but don’t feel like you need to follow this. Go with what works for you!

Idle (pose to pose technique)
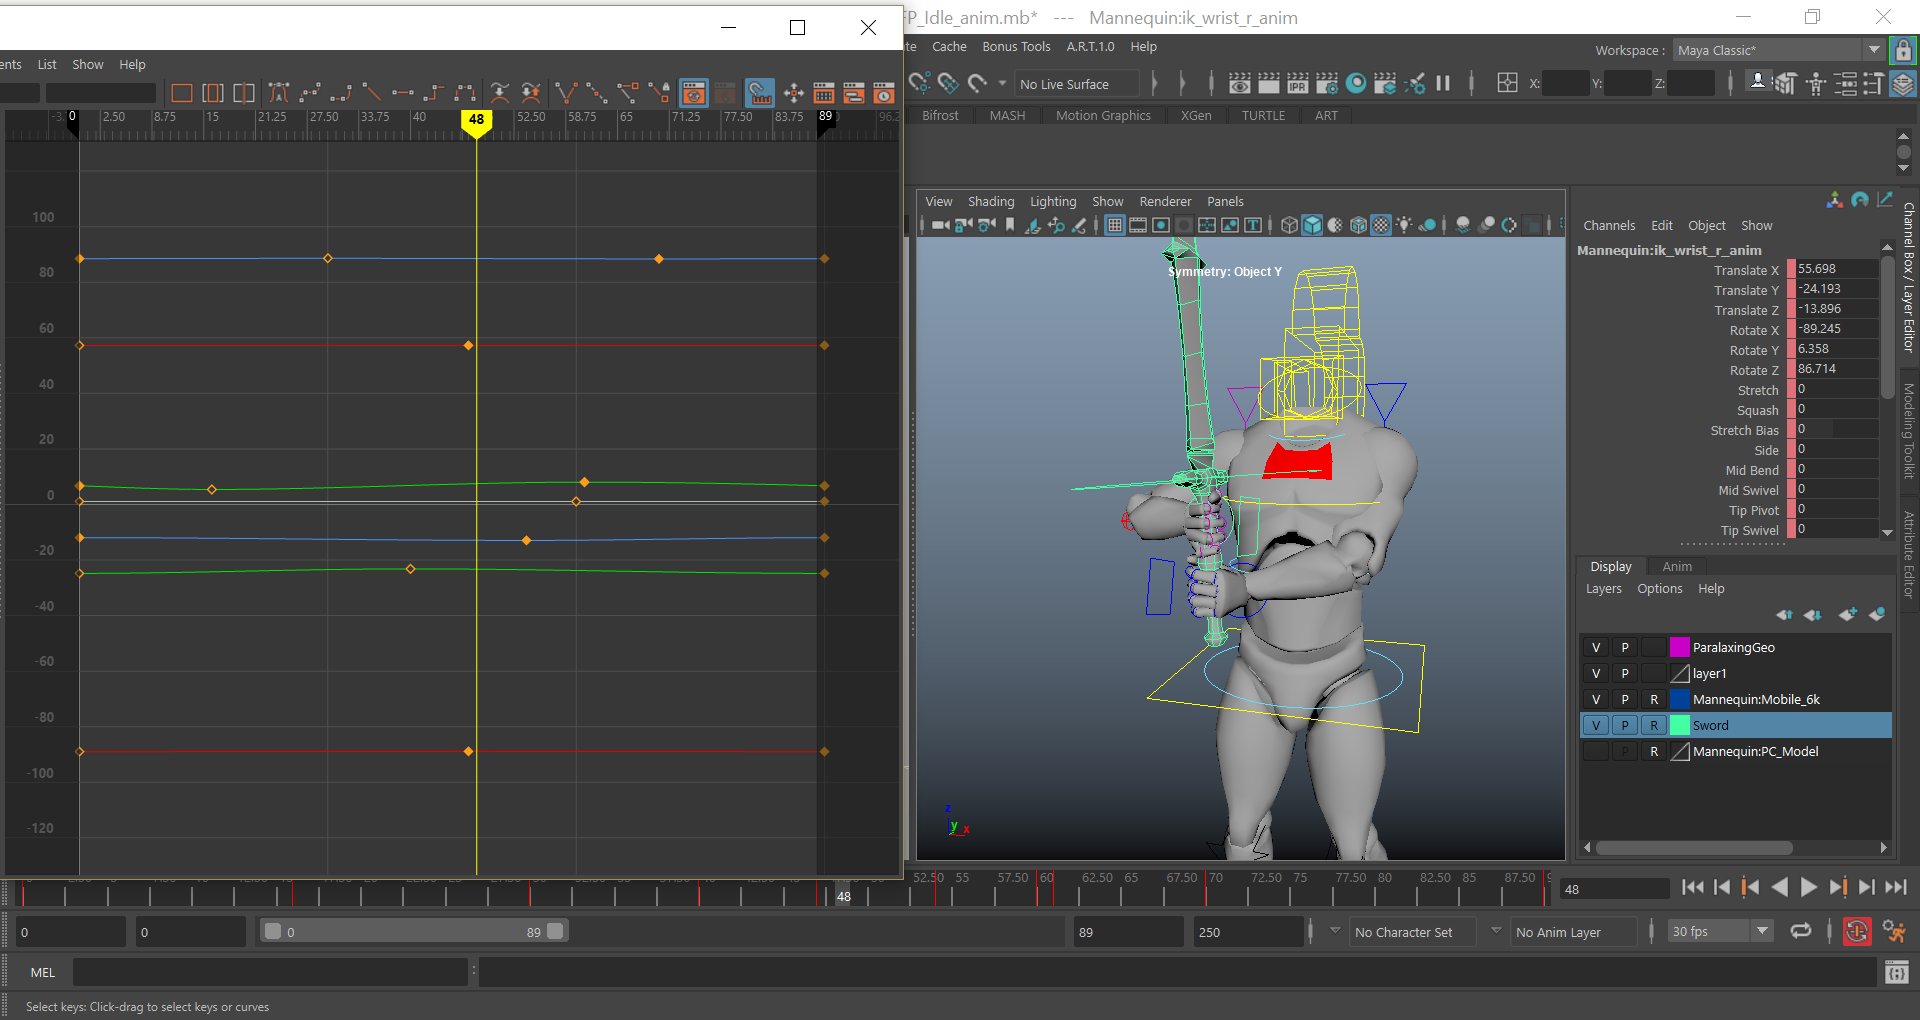
Lets start out with an idle animation. Begin by defining the start/end pose. This pose will be the midpoint for our motion so there shouldn’t be too much rotation. However, the pose should be readable, meaning you should be able to tell our character is idling, even though there is no animation present (yet). Consider specifically posing the hands as this is a great part of the model for adding that readability! When you’re finished, copy and paste this key to around frame 24 (Idle will last for around 1 second, or change as you see fit for timing). It’s also important to note that it doesn’t largely matter the frames per second you are animating to. Unreal will do the interpolating for us and upscale/downscale our animations.
Next, lets focus on some other key poses. Find the midpoint of the animation and set keys. We will set our extreme poses between these 3 keys (don’t animate the non-dominant hand as we are going to use animSnap to constrain this hand to the weapon).
And again, these poses should be readable, but don’t add too much motion as it could be distracting to the player. Remember to animate to the player camera! Just because it looks good in perspective view doesn’t mean it will look right to the player. Tip: if you want both viewports to update animation, go to Preferences->Time Slider->Update View Active All.
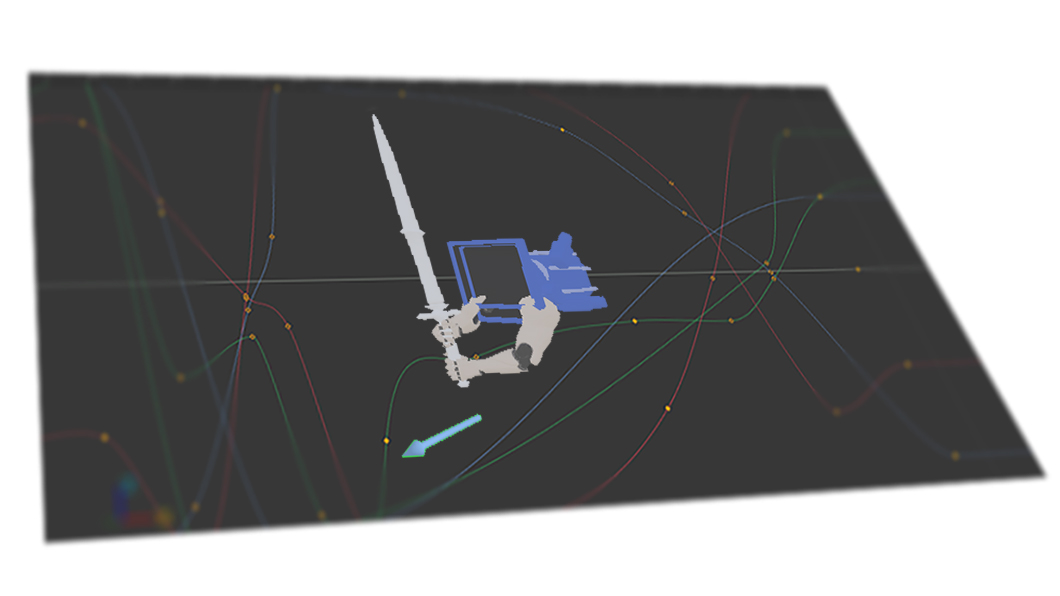
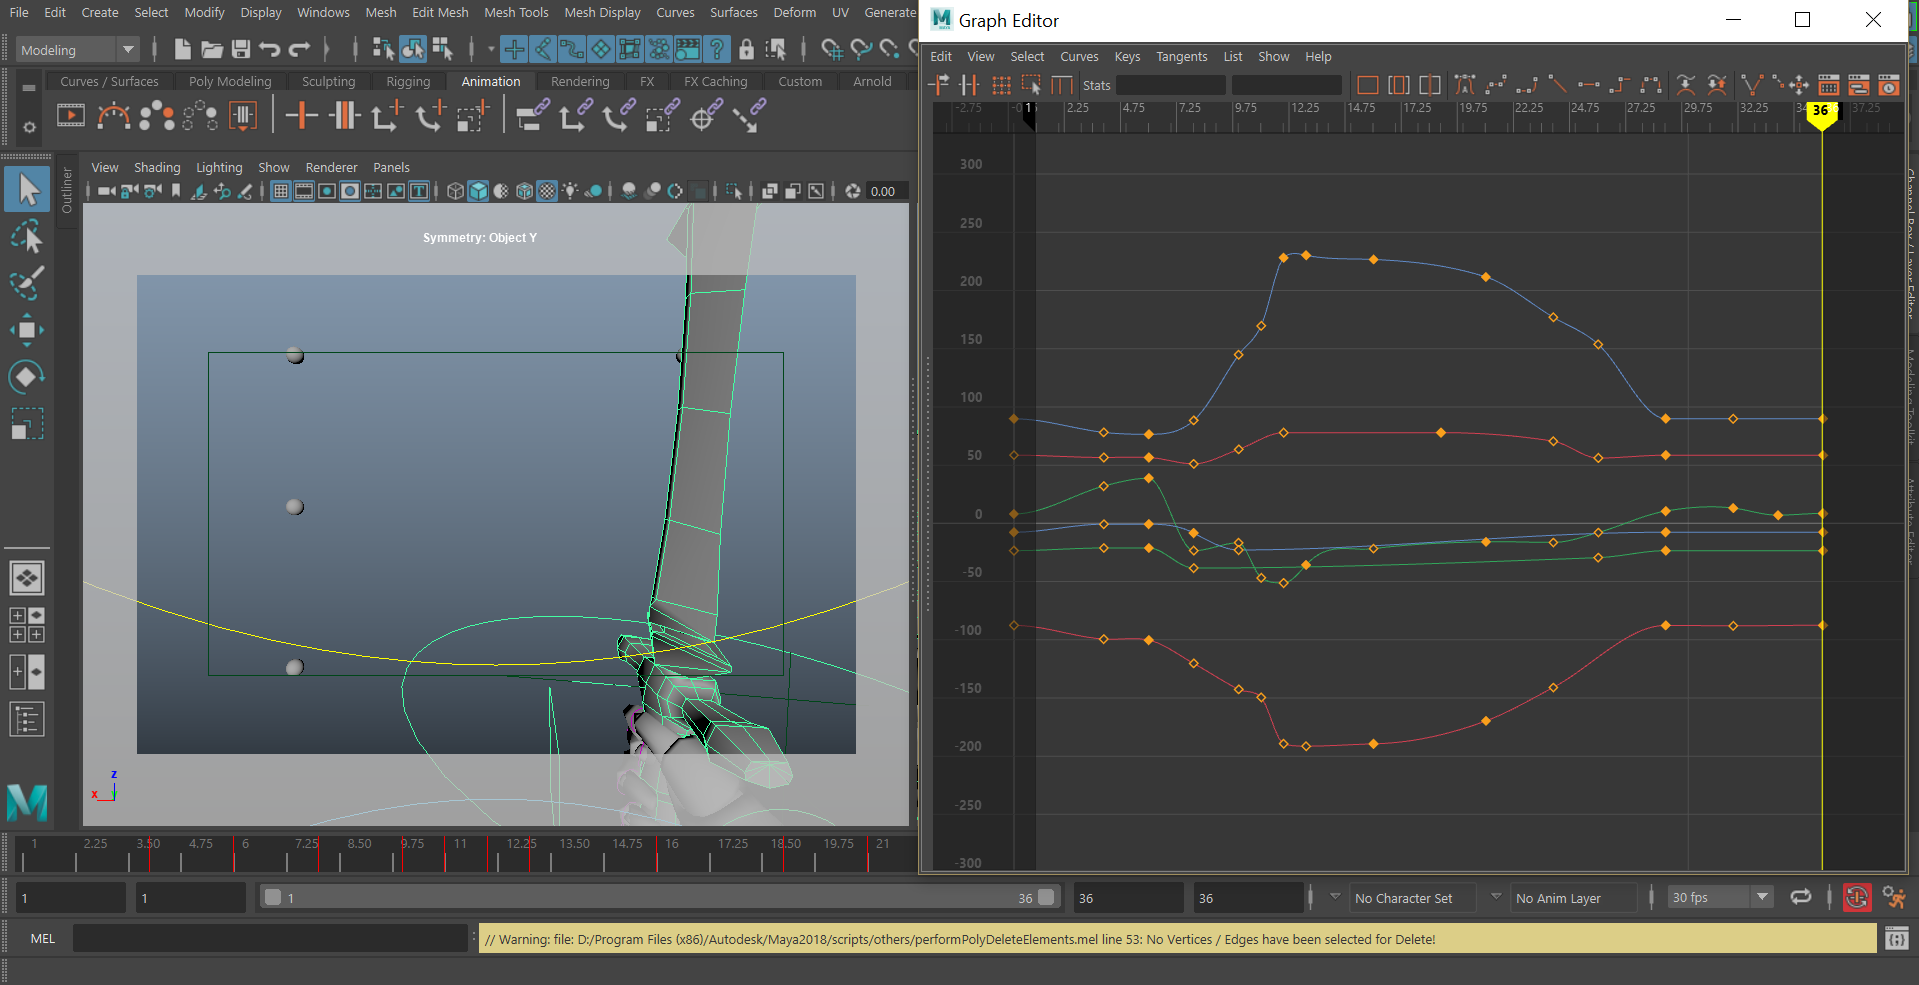
Another tip: Instead of changing the values of a key to make changes, sample the frames that come before it, select a pose that works best, and MMB+drag + S to the key that you want to replace. Note the arc that you want your weapon to follow. Life doesn’t move in a straight line, so to add more expressive & natural movement, you might want to consider animating to an arc or a figure 8. Again, depending on your requirements, you might want to tone down/ramp up the overall movement of your animation. When animating, a little goes a long way.

Now that we have our base loop, let go ahead and refine it. Select all of our characters controls and move the keys several frames forward. Copy the keys and align the new start key to take over the original’s end key. Do this one more time to have our idle animation loop for a total of 3 times (You can also get the same results by selecting all your curves in the graph editor and hitting Curves>PreInfinity/PostInfinity->Cycle - If you don’t see the new curves, go to View->Show Results). This is useful for seeing and modifying how your idle animation transitions between loops (as well as offsetting your animations). Now go ahead and move keys around to get something that you’re happy with! If the non-dominant hand is moving off of the weapon, go ahead an animsnap it back to its correct position.

When refining, make sure objects feel like it has weight. Add counter movement to dampen larger movements (such as a forearm moving the opposite direction of the upper arm for a few frames), and add secondary animation.
Note: when using the first method, if you make changes to one curve, make sure you edit the corresponding sections of the other 2 curves. This makes sure what you animate will reflect the final export.
You’ve just finished the idle animation! This animation will be the base for all the others that we will create.
Attack (straight ahead technique)
With the attack animation, we will use most of the techniques discussed in the previous section. However, since we are not animating a seamless loop, we will not focus on timing in the blockout phase. Save our idle animation as a new file and rename it to attack_anim. Delete all keys except for the beginning pose. Now, using one frame at a time, start to pose out our character. Again, the poses should be readable and strong. It is here you should add the secondary motion/counter movement. The goal here is to add the absolute minimum amount of frames necessary in order to, “sell,” your story.
For the timing phase, start spreading out keyframes as you see fit. Make the animation feel like there is weight (as well as making sure our anims have time to breathe). If you want an action to happen quickly, add some anticipation. This is where you should be working out the, “feel,” of the animation. For refining, continue feeling out your animation and spreading out keyframes. Accentuate your poses and make your curves tell a story. Refine/reanimate until you are happy with the result. We now have some animations to play around with in unreal! It’s now time to export.
Exporting
Depending on your needs, you may want to make sure the export maintains the offset you have meticulously set up for your weapon. This next part is not necessary (if you don’t mind fiddling with rotating/moving the weapon in Unreal), but if you want the Unreal setup to match exactly the way it currently is in Maya, don’t skip to Final Export.
Setting Up for Export
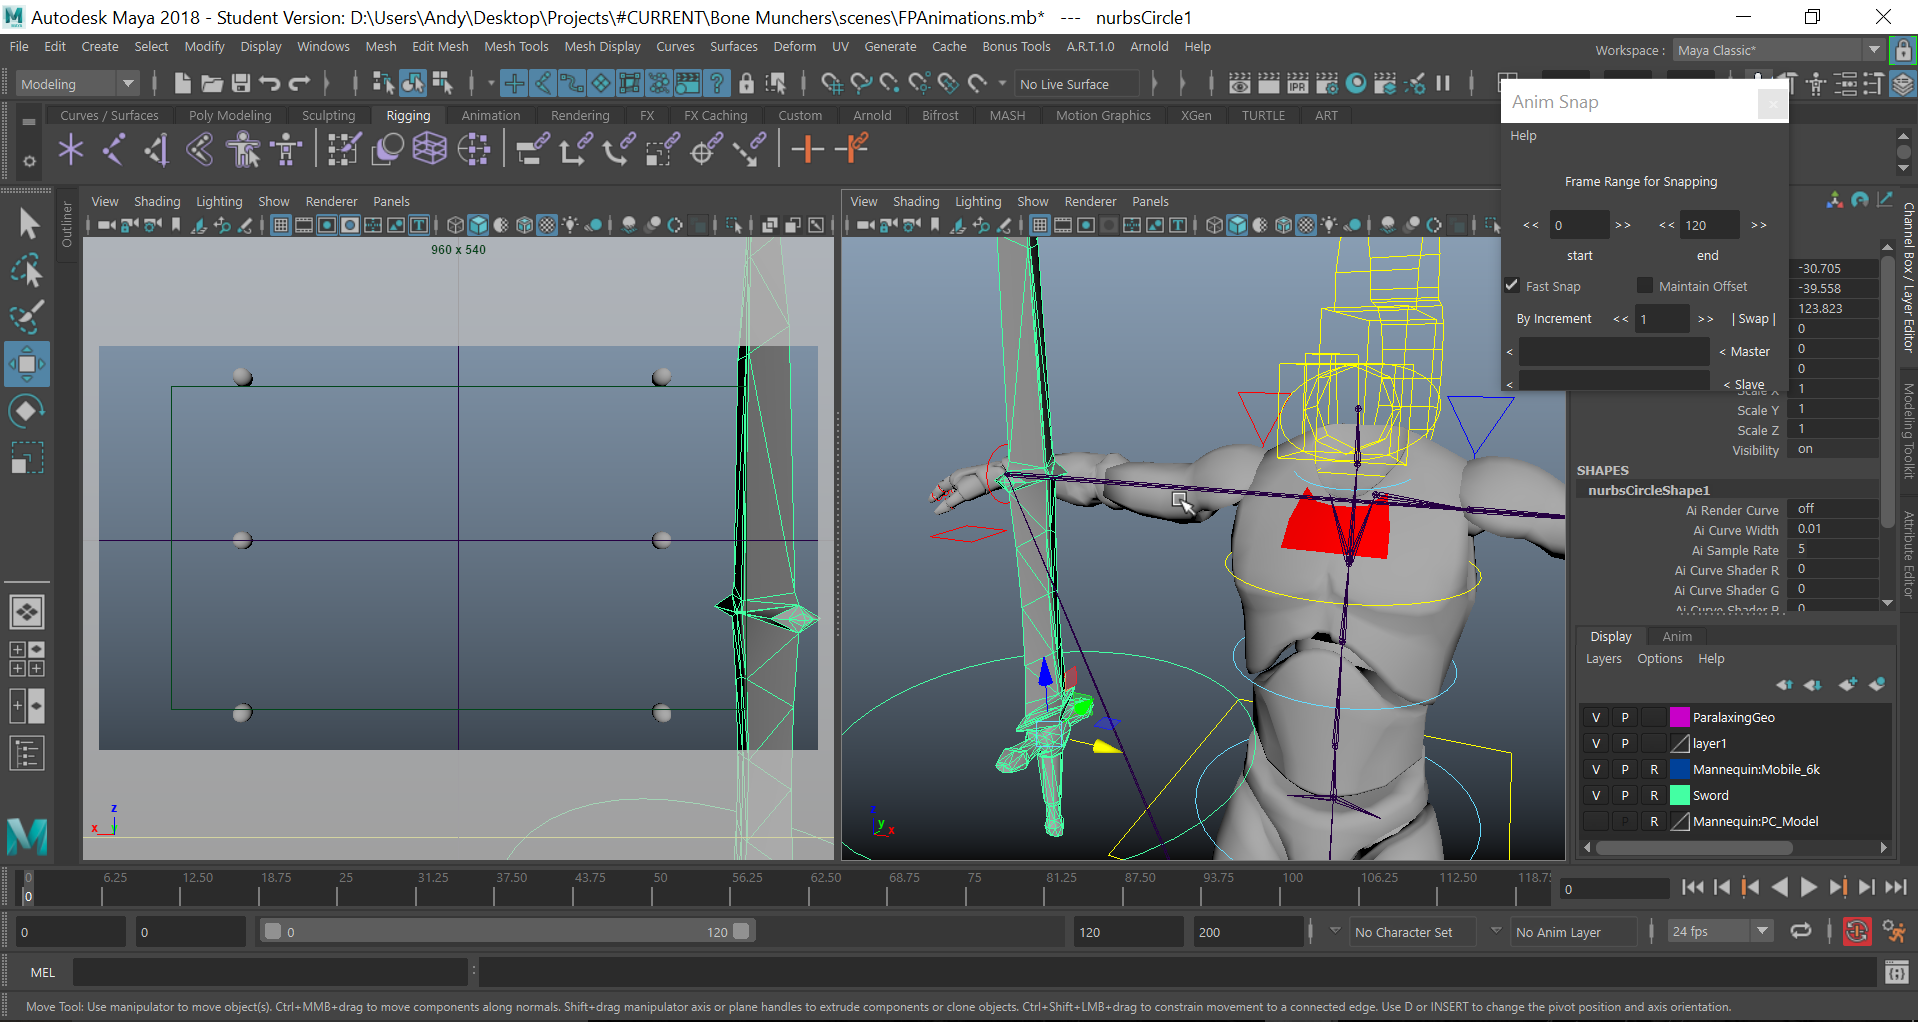
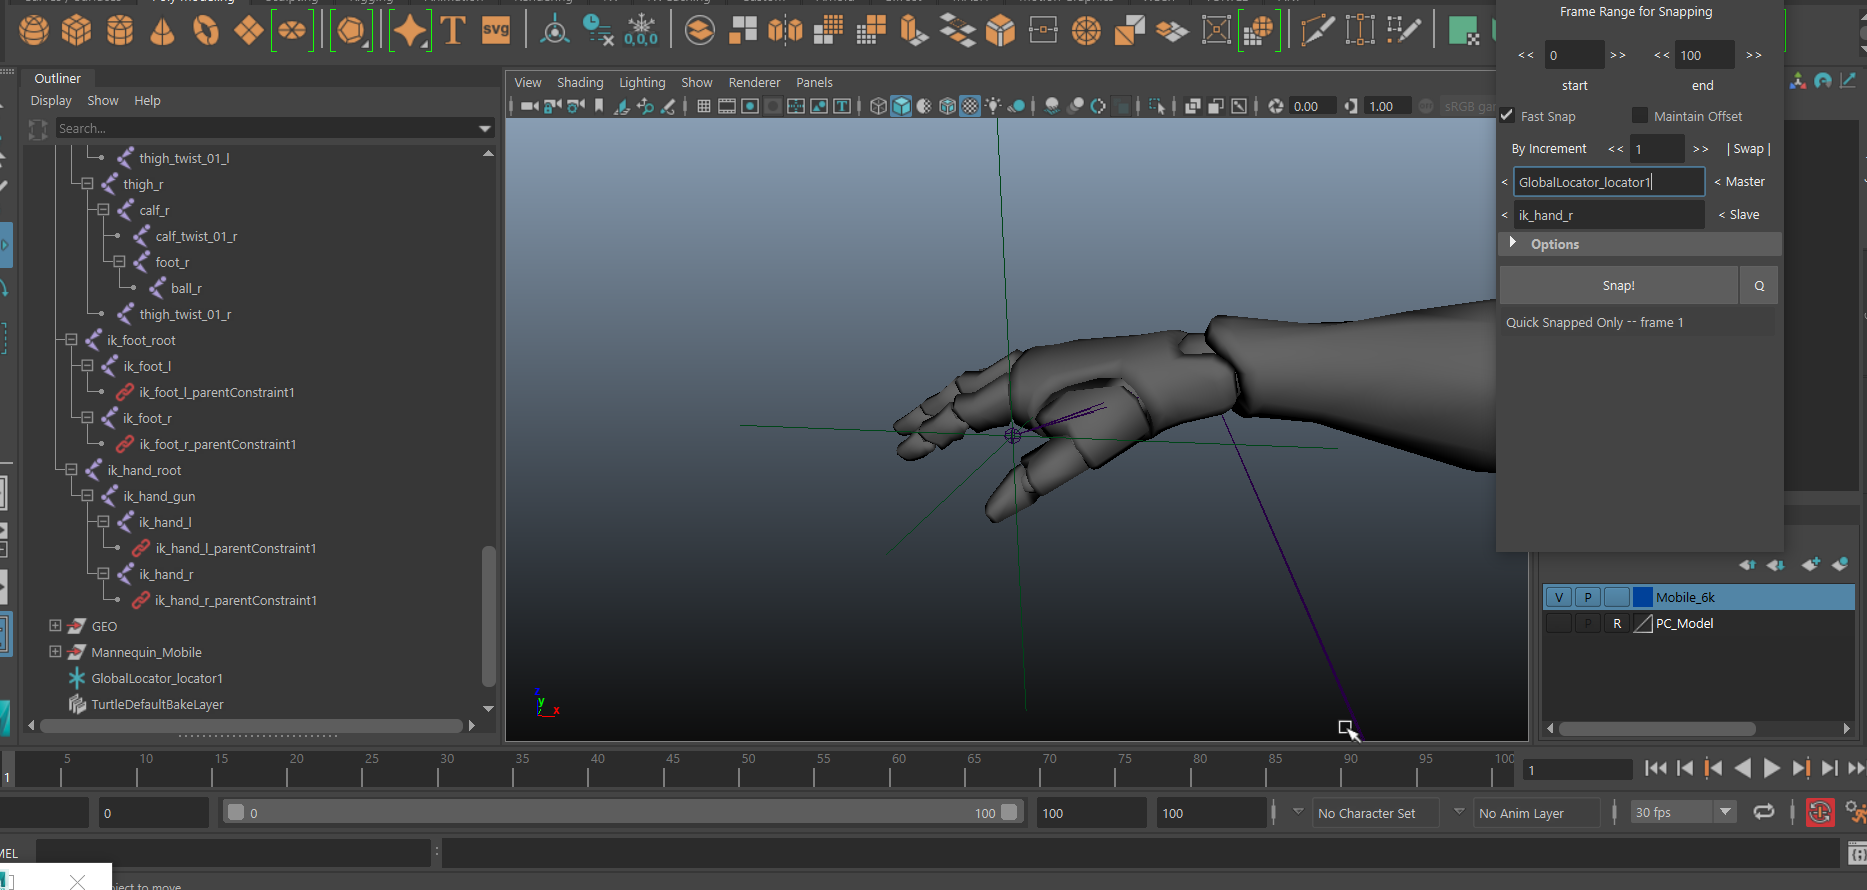
When we export animation using ART, it is processing from 2 files: Animation rig files and export files (both found in the projects folder from within the plugin). We have to use both of these to make sure our export includes the offset for our weapon (make a backup of these files so we can revert our changes after exporting).
Back in our scene, create 2 locators and parent them to one another. Assign the parent locator to the wrist control (with animSnap) and its child to the weapon. Copy/export (as a maya binary) only the locators and then open up the mannequin rig file (should be under AnimRigs/mannequin.mb). paste it in this file and, using animSnap, snap the parent locator to the wrist control. Create another locator and snap it to the child of the imported locator hierarchy. Now, export/copy only the created locator. Don’t save, but just in case you did, remember you can replace the file with our backup. Open the mannequin_export.mb file and bring in the single locator you just made. Using the outliner, locate ik_hand (with suffix _r _l depending on which hand you were animating to). Snap this joint to our imported locator. Then, remove unneeded parent constraints (remove ik_hand_r_gun). Remember to not have any keyed frames in this file or it could cause problems with anim exports. We are now done! Delete the locator and save the file!
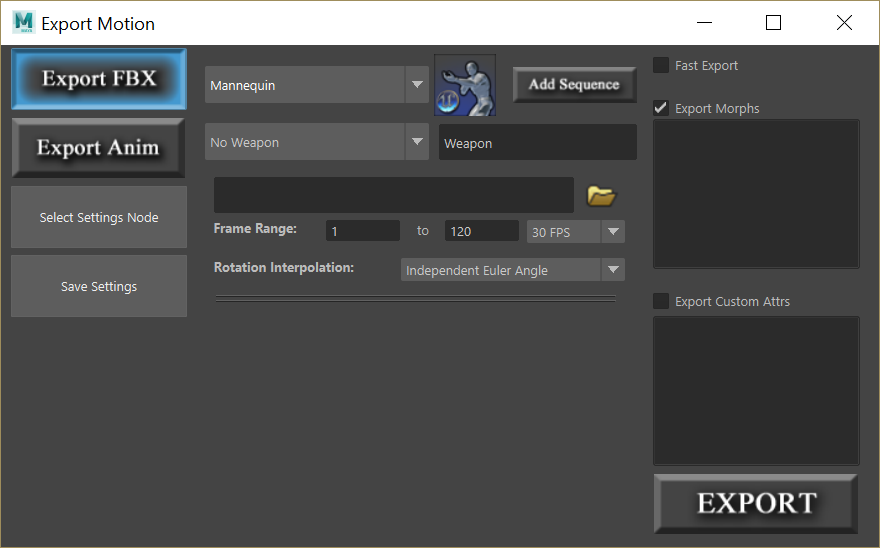
Final Export
The final export is relatively simple. If not open already, go to ART and select the Animation Interface. Press the export from within the interface and you will see a new dialogue box pop up. Keep the settings as is and export as an FBX. Make sure you select the right start and end keyframes and export the animation!
Porting to Unreal
To test our new animations, start a new first person shooter project. Import our FBX files and make sure they are applied to the UE4 skeleton. Locate the current idle animation and left click->replace with new source.
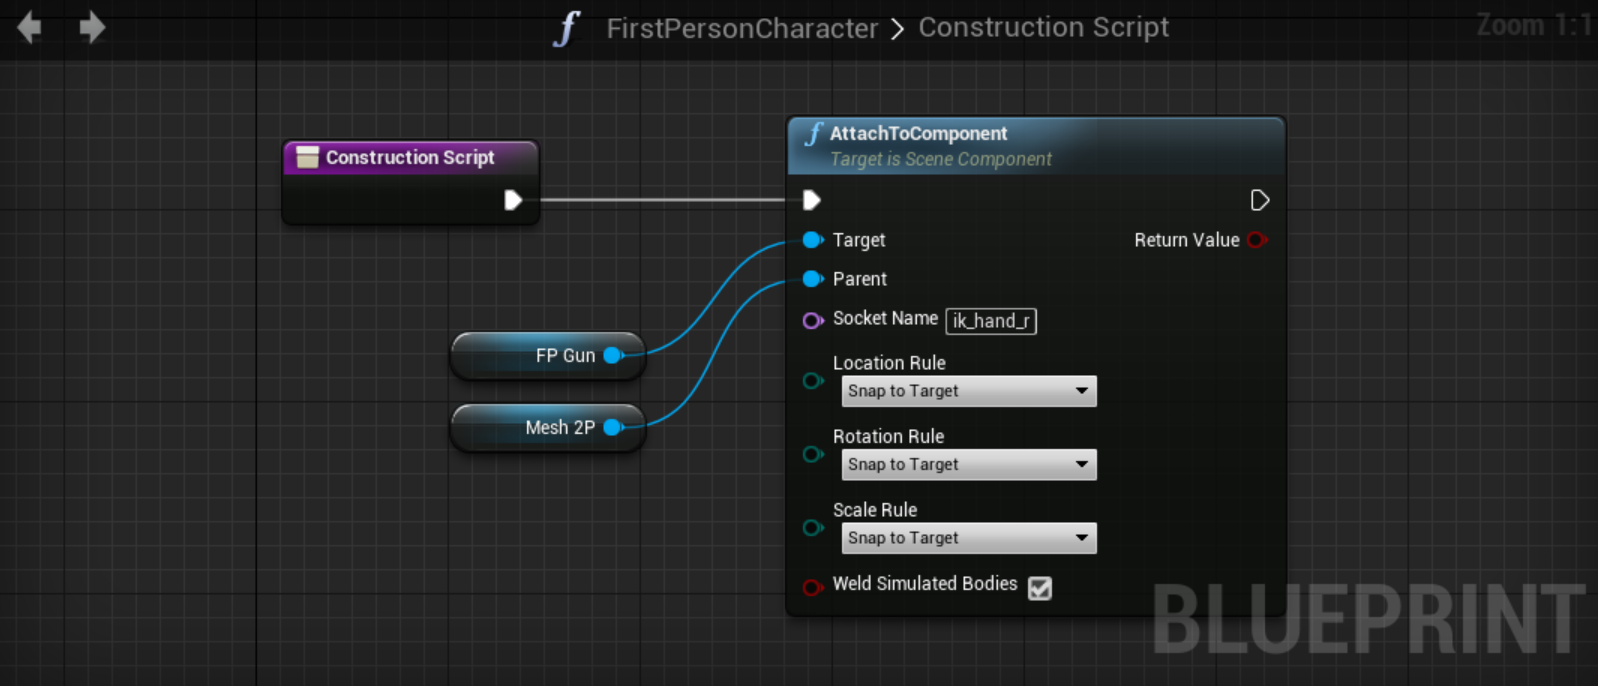
To attach the weapon to our character, go into the character blueprint’s constructor and add the Attach to Component node:
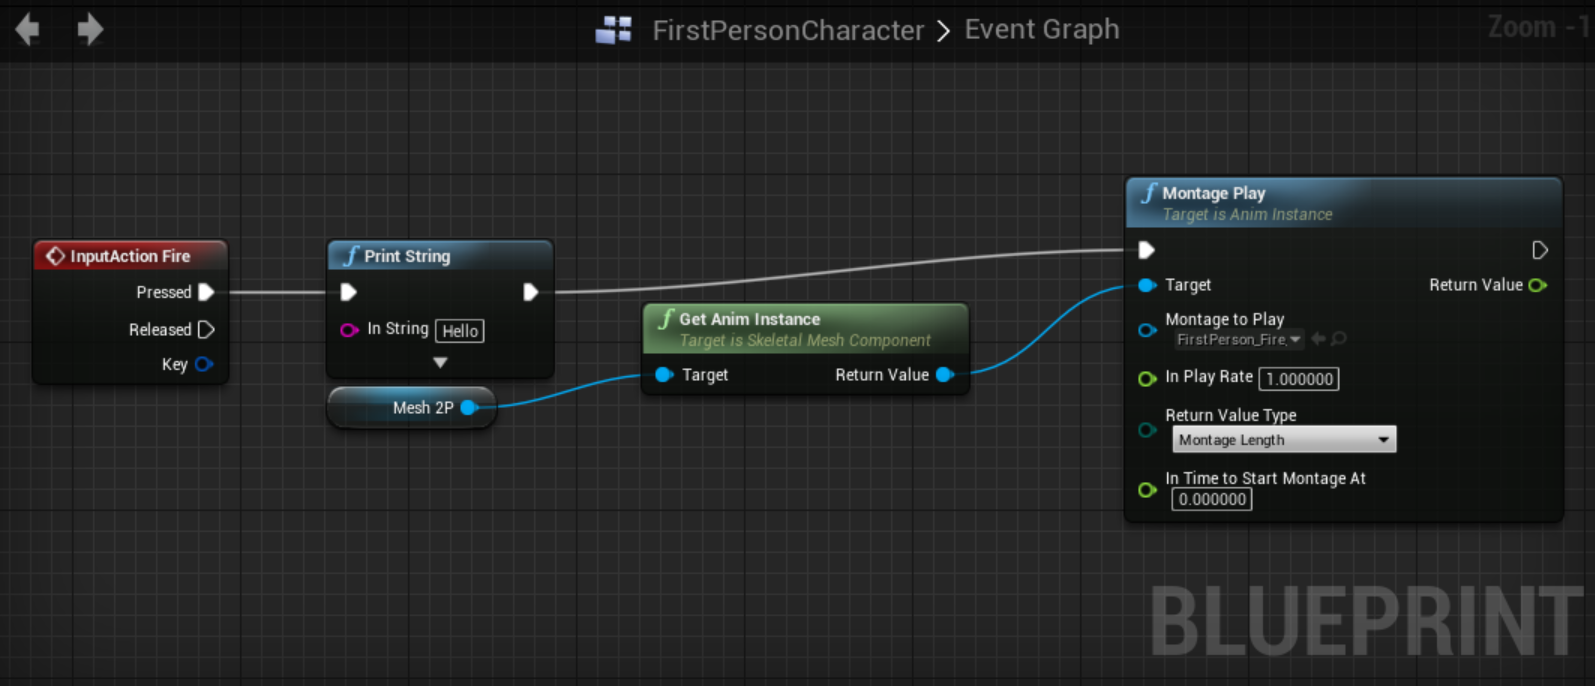
For our attack animation, we are going to use animation montages. Create a new input, attack, and output this to play a montage:
And we’re done! Create some more animations and keep at it. Don’t be scared to go back and refine/reanimate your work. Most of what I have learned came from Gnomon Workshop tutorials, which I highly recommend if you want to expand your knowledge of the Unreal animation pipeline (or learn just about anything from environmental design to 3D printing). I recommend watching Creating First Person Shooter Animations for Games, which is an extended and in-depth tutorial of this article. Bill Buckley, the instructor for the tutorial series, gives many great tips and tricks for working between Maya and Unreal.
And with that, see you guys later and have a great day everybody!