Adding Mixamo Animations to Unreal Rigs
in Game Design on Maya, Ue4

So you acquired some models from the unreal marketplace and want to spice it up with some animations. While the UE Marketplace has a nice collection of animation packs, I will show you how to use Mixamo (A currently free (as of 2017) rigging/animation toolkit) to import an already rigged character from Unreal and export animations provided by Mixamo.
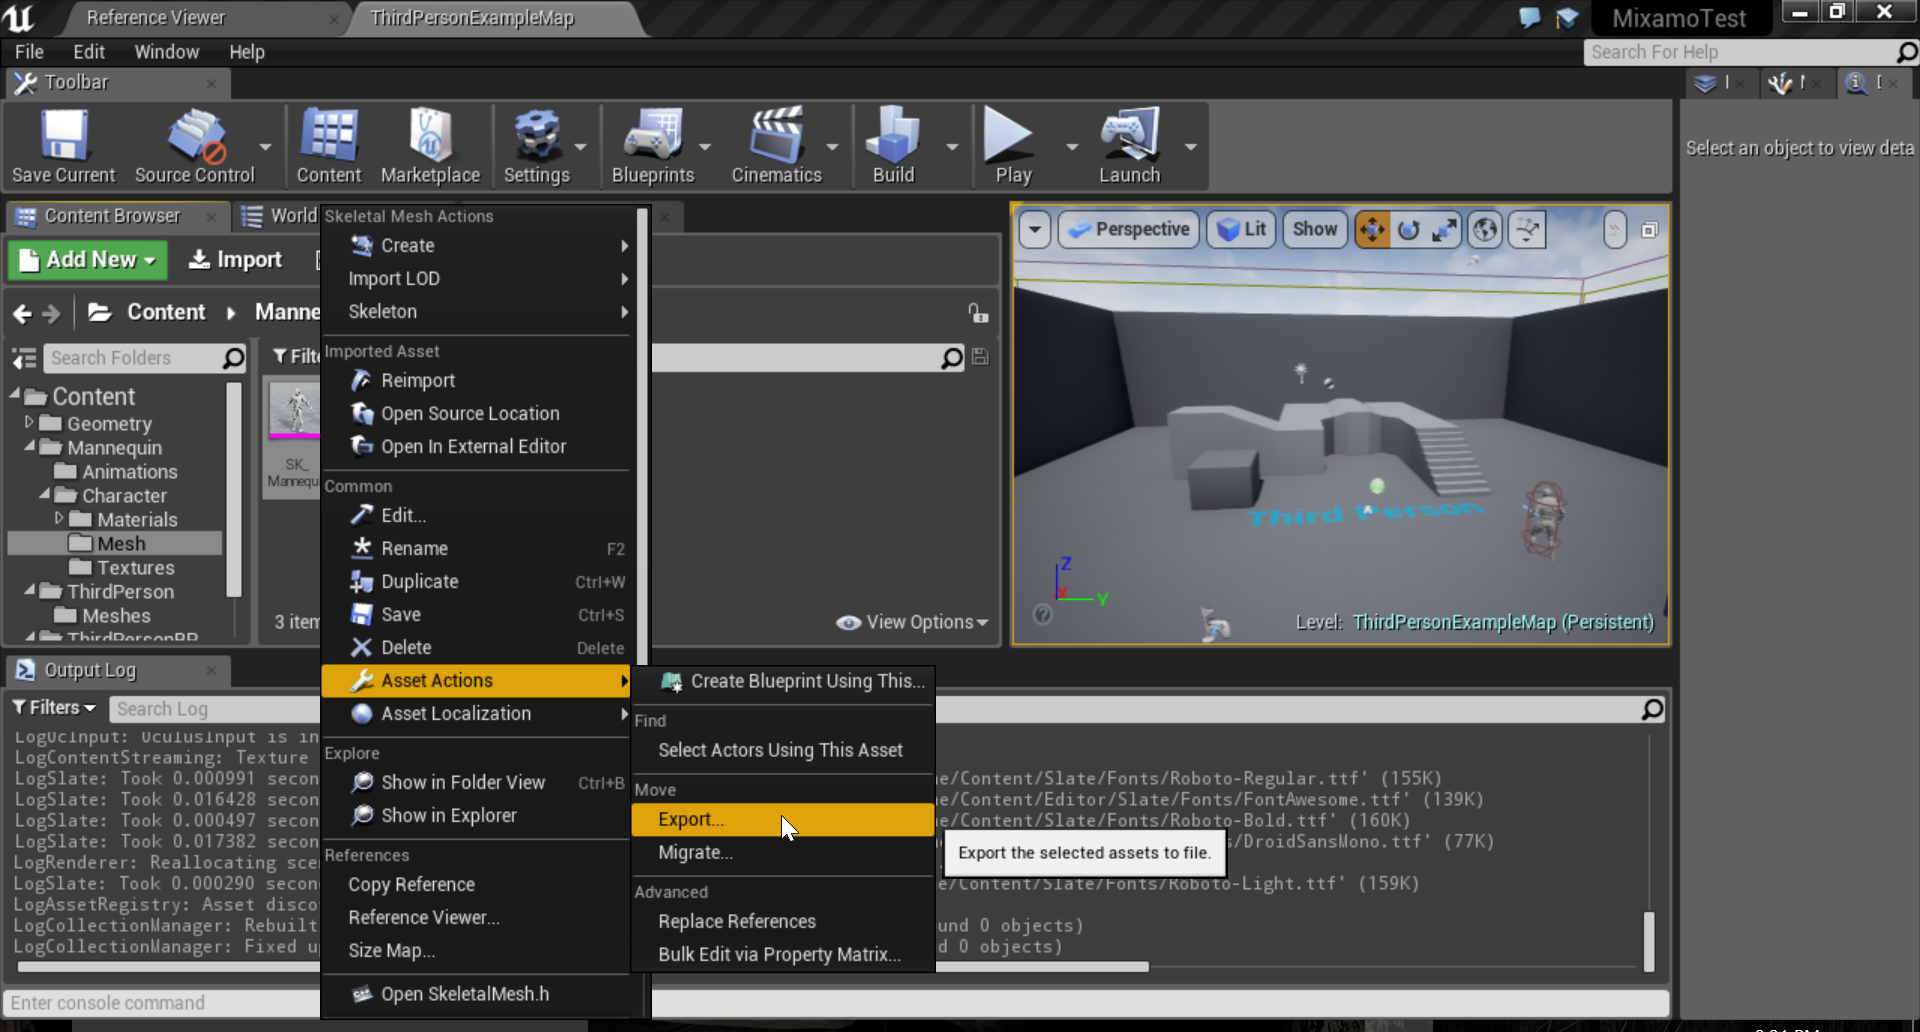
Start out by opening your project in Unreal and selecting a mesh that you wish to add animations to. In this case, I will be using the standard Unreal model. LMB over the desired asset and click Asset Actions->Export. Make sure to select the mesh and not the skeleton or physics component as we want to export both the mesh and its skeleton.
Over in Mixamo, if you haven’t already, sign up for an account and you will be prompted to either upload a character or select from a premade one. Locate the file that we had exported and Mixamo will begin to process the file.
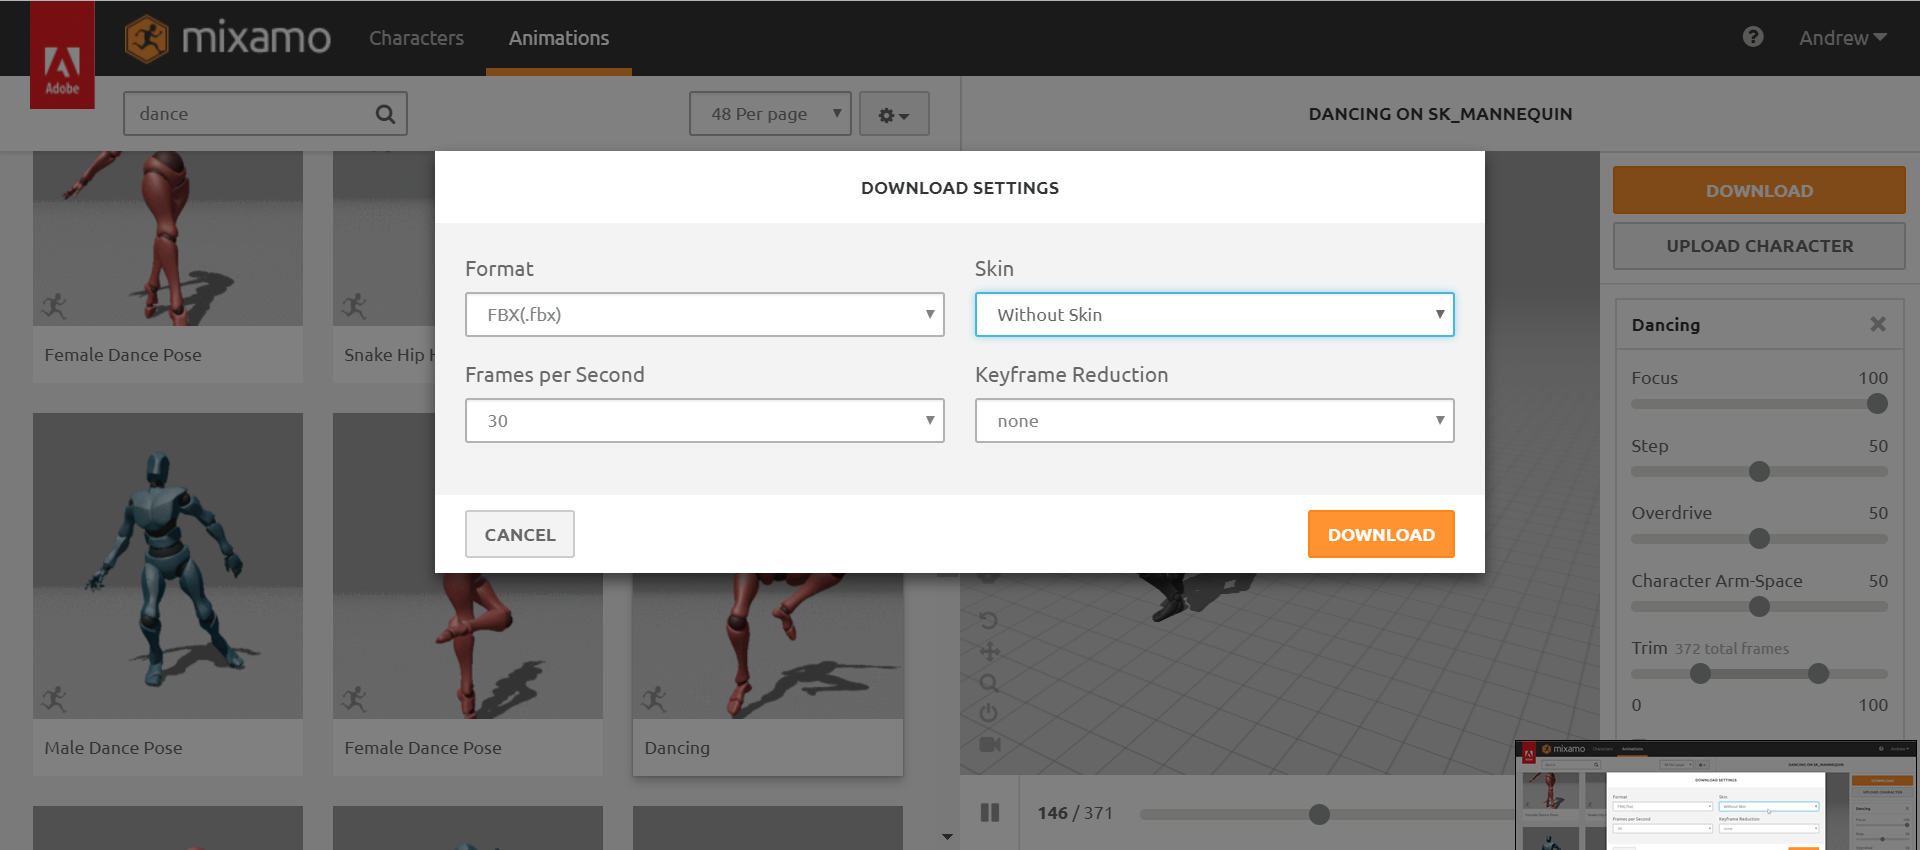
Once done, you’re free to explore Mixamo’s library of animation. Pick something you like and use the sliders to make adjustments. When you’re happy with the animation, hit the download button. In the download settings, make sure to download without skin and leave all other options at their default.
If we jump into this new asset in Unreal and show bones (show->bone->all heirarchy), we can see that the pelvis doesn’t move at all. This is happening because there is animation info on the root bone, and in Unreal, the rig moves in relation to the root. Mixamo doesn’t really export nicely with Unreal, so we need to do some tweaking.

Open up Maya (Or your choice of 3D modeling software) and import your FBX file. If we play the animation here, the rig moves as intended. Except, we need to make sure the root bone doesn’t move for the duration of the anim.

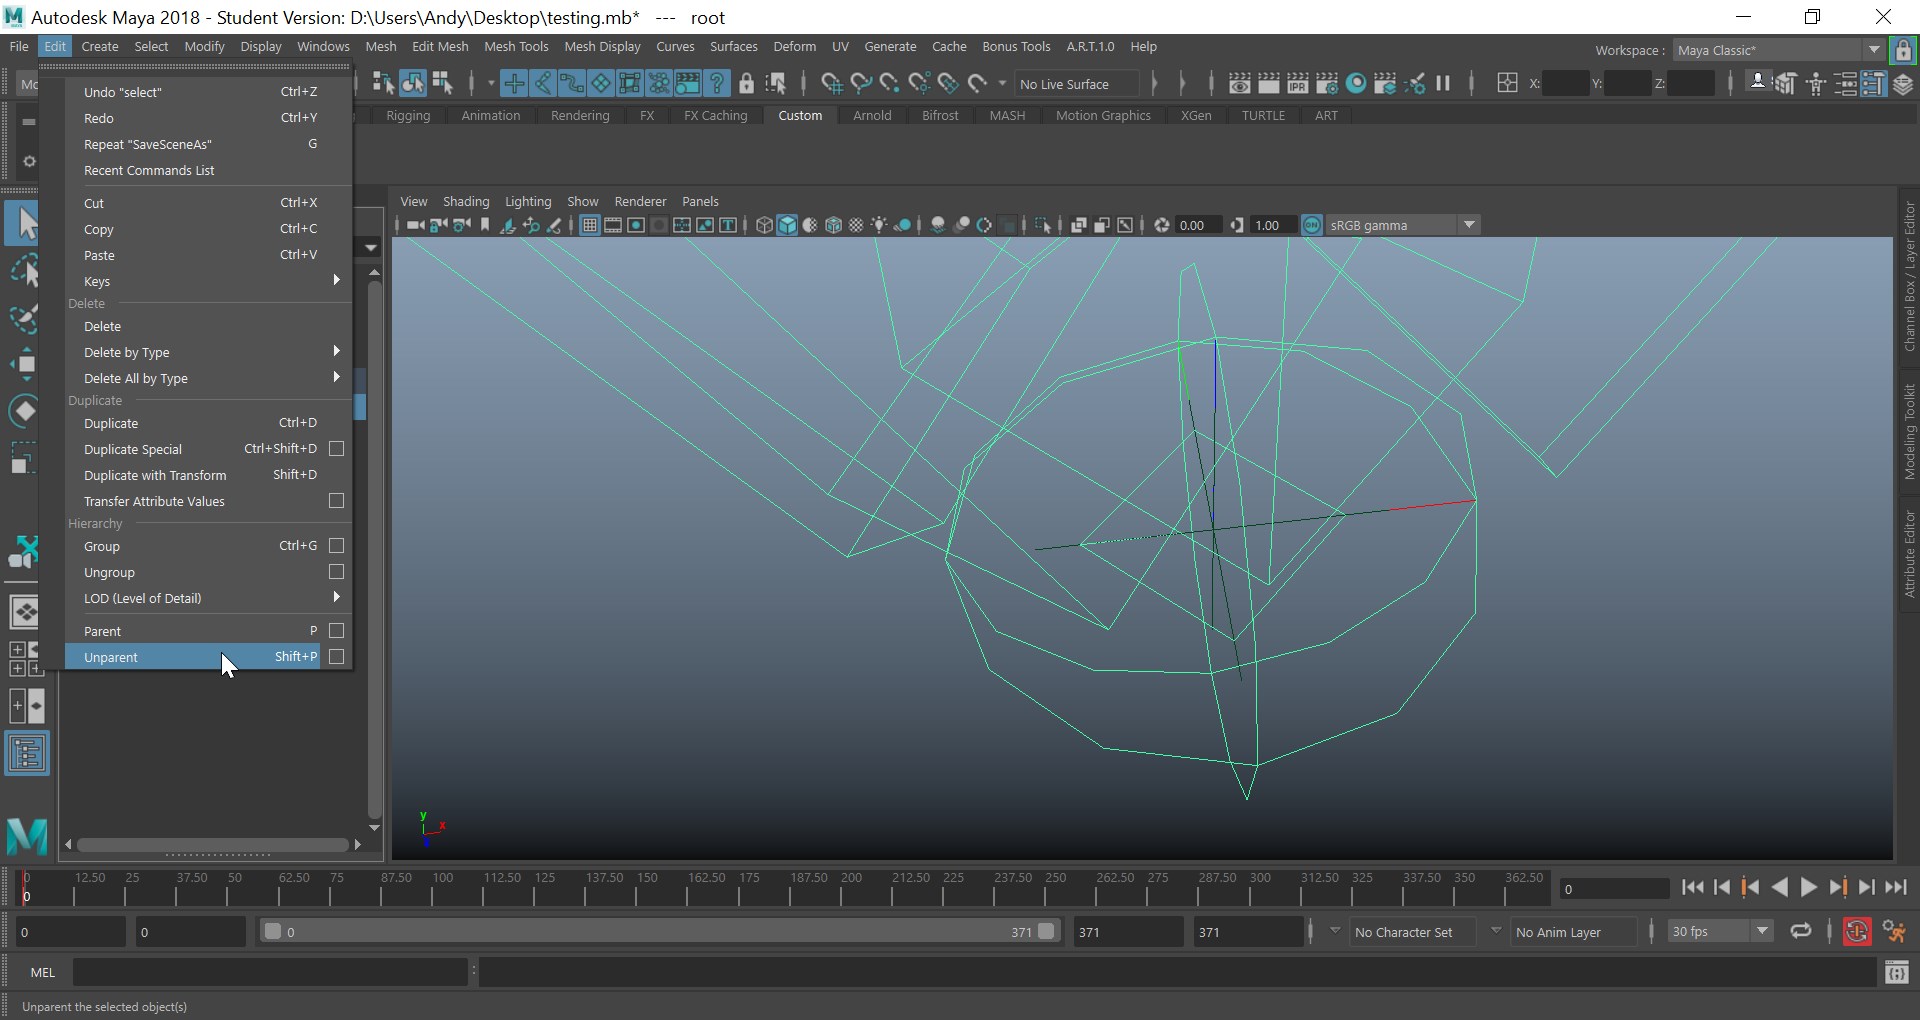
To do this, open up the outliner and select the locator (which should be at the top of the character’s hierarchy chain). The animation that we need to relocate is on this locator, so select the next bone in the hierarchy chain (in my case it is the root bone), and hit unparent (edit->unparent). Playing the animation will now give us a similar result to what we saw in Unreal.
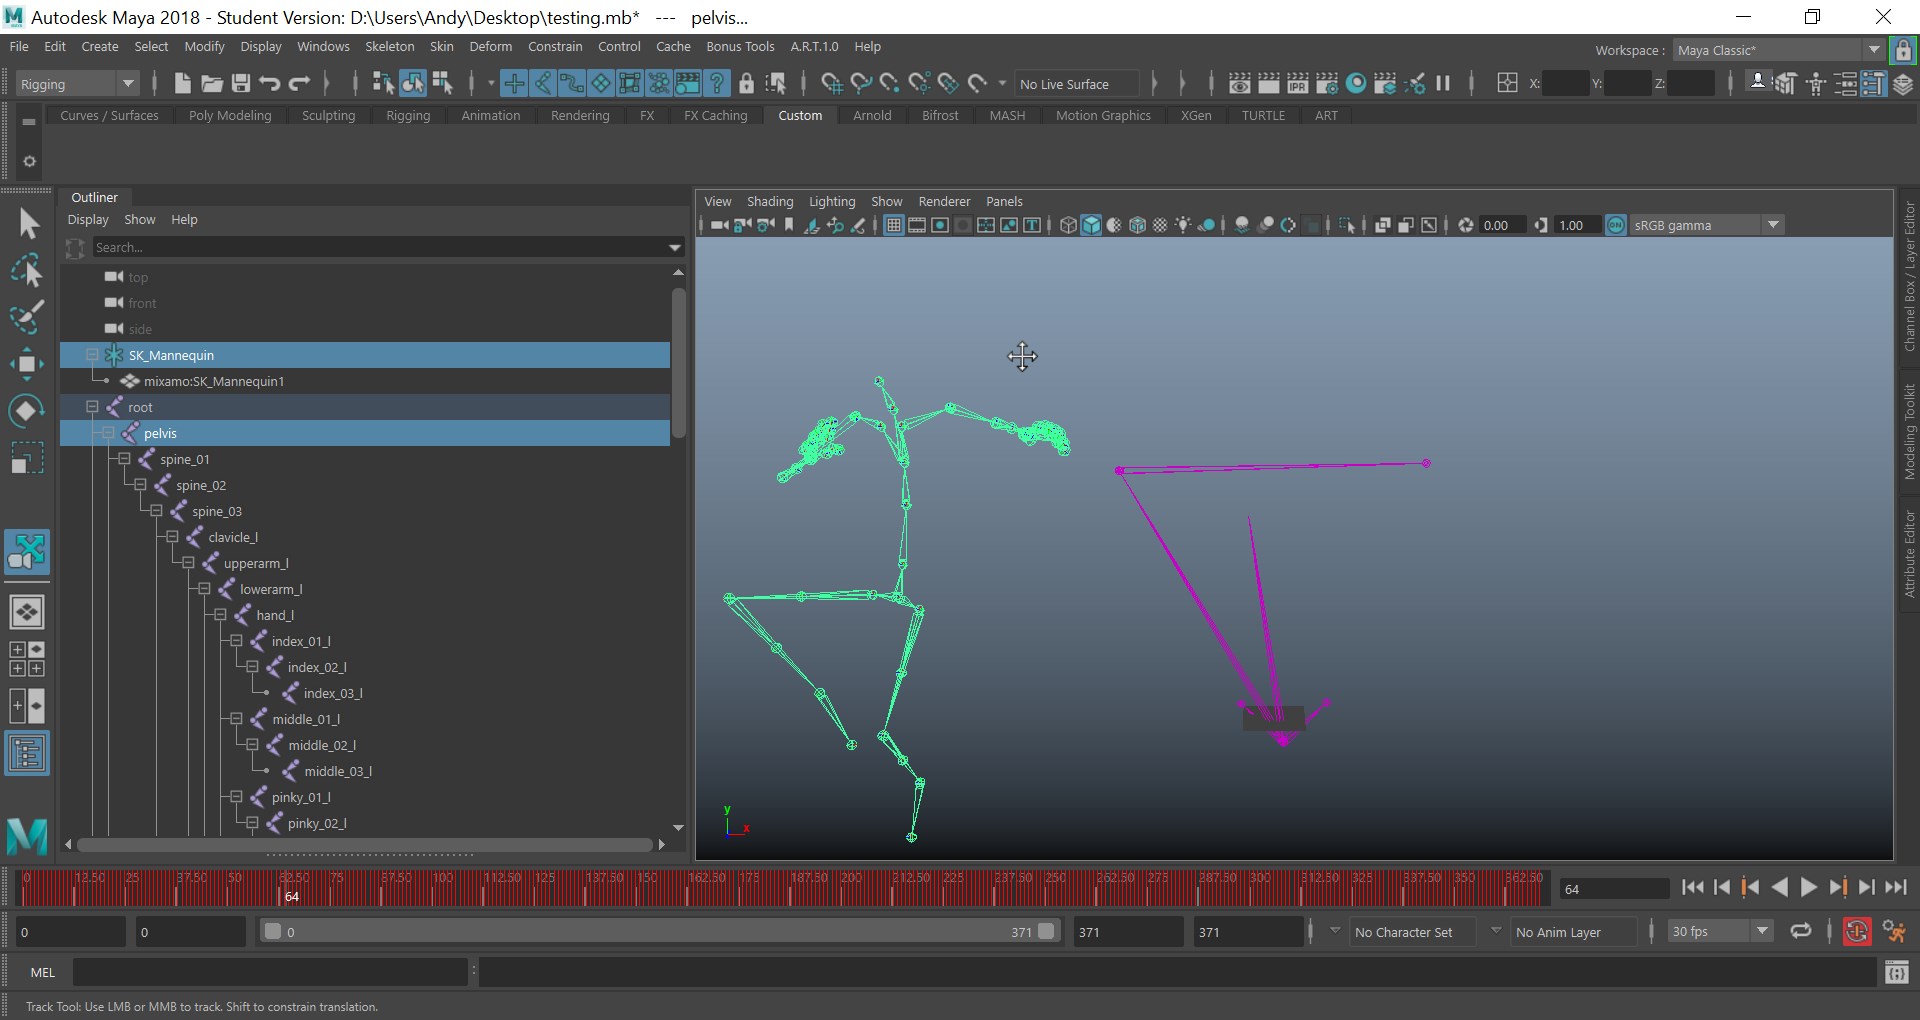
To get the desired result, first make sure you are on the rigging menu set, select the locator and then the pelvis, and go to constrain->parent constraint. The animation will now behave like it did before our modifications, except animations are now moved off the root bone.
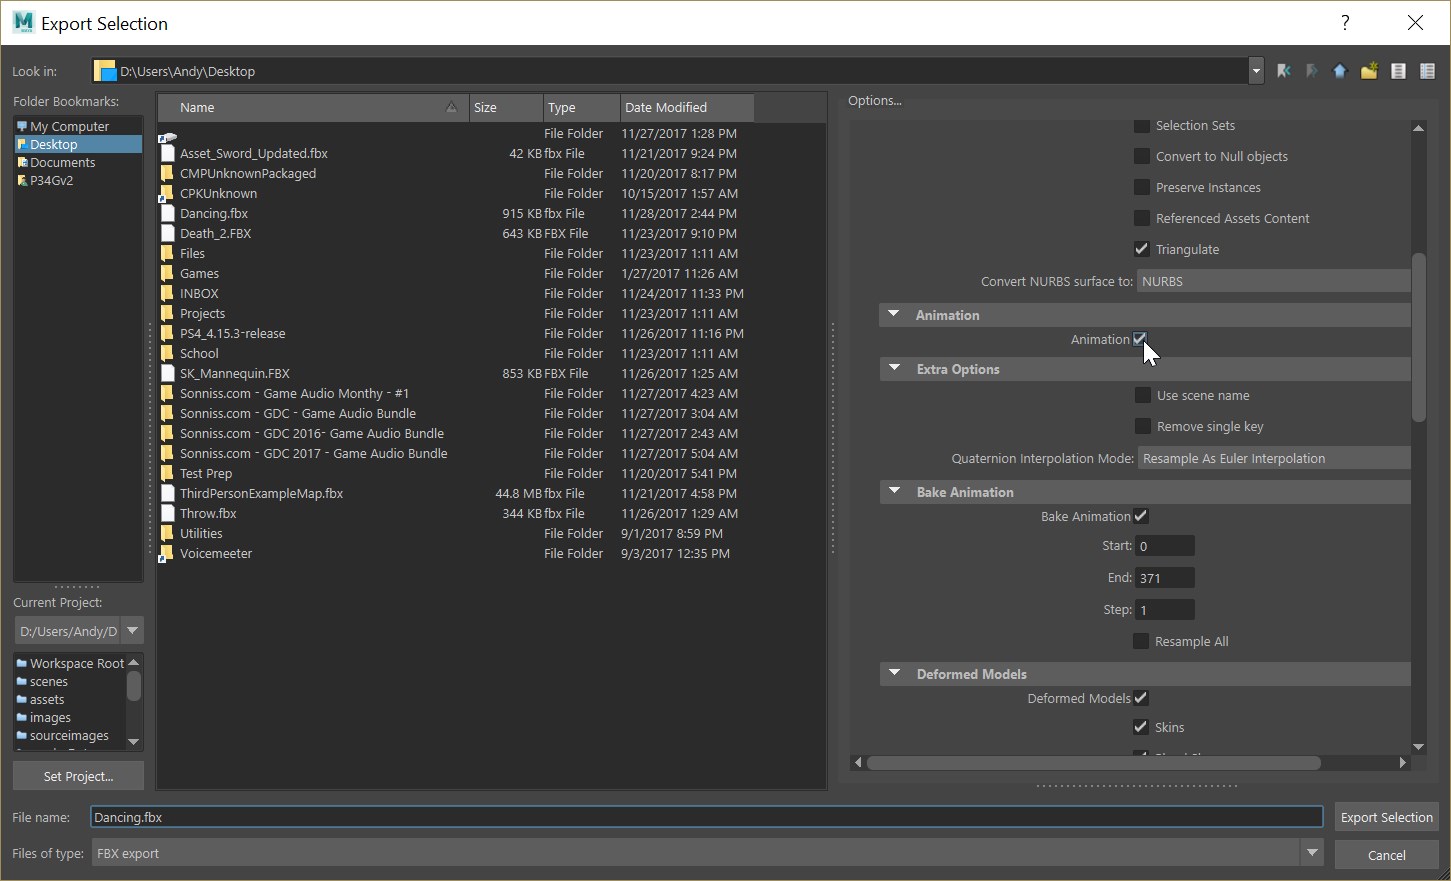
Select the rig and go to file->export. export as an FBX and make sure animation and bake animation is selected. Ignore the warning that appears. We are now ready to upload to Unreal!
Over in Unreal, left click in an asset folder, and select import. select our fixed animation and make sure to specify what skeleton the animation will be applied to. Hit import and we are now done! Test it by dragging it into the world and see your models jump around.
You now know how to use Mixamo with unreal characters without the need to re-target skeletons. Experiment with some more animations and add life to your projects.